 The time has come and I am going to share my experiments with AngularJS - a JavaScript framework that acquires more and more fans. It still isn't the most popular JavaScript framework in the world but many people at least have heard about it. As this is a beginning of a new territory (frontend) on dba-presents.com, I will start from setting up a project in IntelliJ IDEA. Bower will act as a web package manager, Gulp will be used for automating a build process. It is a good template for a new AngularJS project. For inexperienced developers, the whole process may take a few hours going back and forth. I hope this tutorial will save you some time.
Prerequisites
Before going further with setting up a project, a few prerequisites are required. They are:
- IntelliJ IDEA installed.
- NPM installed and added to the PATH system variable (for Windows OS).
This step can be verified by running npm version. Command not found is not a desired output. - Git installed and added to the PATH system variable (for Windows OS).
This step can be verified by running git --version. It is good if version information is printed.
If any of the above verification steps does not pass, refer to the proper websites for installation instructions.
Create a project and directory structure
Open IntelliJ IDEA and choose File -> New Project. In the window that showed, choose Static Web on the left and Static Web on the right. My project is going to be pure web without any backend so that is why I choose this option.

Click Next and type a project name on the next screen. In my case it is AngularTest. Now, a project is created and it is a turn for creating a directory structure for my web application.
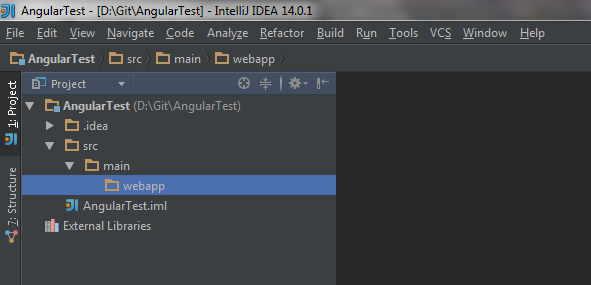
By right-clicking on the AngularTest project on the left menu (Project), I choose New -> Directory and type src/main/webapp. This is how my directory structure looks:
Initiate NPM
Before installing any additional package, I tell NPM to create a package.json configuration file by running the following command:
D:\Git\AngularTest>npm init
I can see the package.json file created in the root directory of my project.
Install and configure Bower
Bower is going to be a package manager for a web part of my application. This is the moment for installing and configuring it.
Install bower globally so any other project could use it:
D:\Git\AngularTest>npm install -g bower
And install it locally also:
D:\Git\AngularTest>npm install bower
Now, the bower command should be available. This can be verified by running the following command:
D:\Git\AngularTest>bower --version
1.4.1
If it reports that the command does not exist, try restarting Intellij IDEA if you use the embedded Terminal.
At the root of the project create .bowerrc file with the following content:
{
    "directory": "src/main/webapp/bower_components"
}
It set the bower components directory to a specific location. The src/main/webapp directory will contain the main index.html file so bower_components must be inside. Without this file, bower_components would be created in the root of the project which would not be visible by index.html.
The following command creates a Bower configuration file - bower.json.
D:\Git\AngularTest>bower init
You will be asked for some configuration options. I accepted defaults. When it is done, verify if the bower.json file was created in the root of the project.
Install Angular
If Bower is in place, lets use it for downloading AngularJS. Go to the Terminal in IntelliJ IDEA and use bower's install command from the main project directory to install AngularJS module.
D:\Git\AngularTest>bower install angular --save
bower angular#* not-cached git://github.com/angular/bower-angular.git#*
bower angular#* resolve git://github.com/angular/bower-angular.git#*
bower angular#* download https://github.com/angular/bower-angular/archive/v1.4.4.tar.gz
bower angular#* extract archive.tar.gz
bower angular#* resolved git://github.com/angular/bower-angular.git#1.4.4
bower angular#~1.4.4 install angular#1.4.4
angular#1.4.4 bower_components\angular
D:\Git\AngularTest>
The --save option adds an angular dependency to the bower.json file. You should see below code in the file:
"dependencies": {
  "angular": "~1.4.4"
}
If at this point you know that you will need any other web library, it can be added in a similar way. If not, it can be added any time later.
Install and configure gulp
Gulp is a tool for automating work with the web part of an application.
First, install gulp globally:
D:\Git\AngularTest>npm install -g gulp
Then, do the same locally with --save-dev option.
npm install --save-dev gulp
After doing this, you can check that gulp entries were added to the package.json file.
I also install gulp-uglify pluggin that I will use for preparing minification of JavaScript.
D:\Git\AngularTest>npm install --save-dev gulp-uglify
Now, I have gulp and gulp-uglify pluggin. I will need also del pluggin to handle deleting old build files before creating new ones during the build process.
D:\Git\AngularTest>npm install --save-dev del
I will need a few more pluggins more minification and one for adding a hash to the output scripts to make sure the browser will not use cached scripts when new ones are requested.
D:\Git\AngularTest>npm install --save-dev gulp-usemin gulp-minify-html gulp-rev
Having them, I can create first automation. I create a gulpfile.js file in the root of the project with the following content:
var gulp = require('gulp');
var del = require('del');
var uglify = require('gulp-uglify');
var usemin = require('gulp-usemin');
var minifyHtml = require('gulp-minify-html');
var rev = require('gulp-rev');

gulp.task('clean', function (cb) {
    return del([
        // everything inside the dist folder
        'src/main/webapp/dist/**/*'
    ], cb);
});

gulp.task('usemin', function () {
    return gulp.src('src/main/webapp/*.html')
        .pipe(usemin({
            html: [minifyHtml({empty: true, conditionals:true})],
            js: [uglify(), 'concat', rev()]
        }))
        .pipe(gulp.dest('src/main/webapp/dist'));
});

gulp.task('build', ['clean'], function () {
    gulp.run('usemin');
});
After doing this, I have a build task that starts with src/main/webapp/*.html files. Then parses them and based on the result uglifies JavaScript code, concatenates it in one big file, adds a hash to the file name, links the new name back in the HTML files and stores the output files in src/main/webapp/dist. The build task can be executed by this command:
D:\Git\AngularTest>gulp build
This dist directory will contain code that is ready to push to production. Of course, there is nothing in it currently because there is nothing to minify yet.
Create a web page
Now, it is a good moment to create the first web page in the project. In my case it will index.html in the src/main/webapp directory with the following content:
<!doctype html>
<html lang="en" ng-app>
<head>
    <meta charset="utf-8">
    <title>AngularTest</title>
    <!-- build:js scripts/scripts.js -->
    <script src="bower_components/angular/angular.js"></script>
    <!-- endbuild -->
</head>
<body>
<p>2 + 3 = {{ 2 + 3 }}</p>
</body>
</html>
The {{ 2 + 3 }} phrase shows if AngularJS works. If it does, the web page should show 2 + 3 = 5.
The comments <!-- build:js scripts/scripts.js --> and <!-- endbuild --> are necessary for the usemin function to recognize which code should be uglified and referenced to.
Test it
When everything is correctly set up, I can run a test. First, I prepare a build version of my web page by executing the following gulp task:
D:\Git\AngularTest>gulp build
The dist directory got a new content - uglified JS and HTML files.
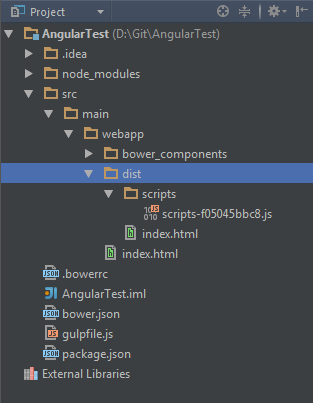
Second, I open the generated uglified version (production ready) HTML file by right-clicking on src/main/webapp/dist/index.html and choosing Run index.html option. A browser opens a page and shows 2 + 3 = 5.
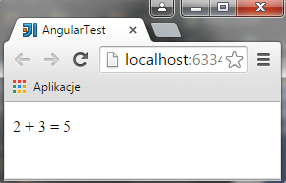
It worked!