 If a web application requires signing in, there are two options. The first one is to create and maintain a users database on your own. It has some disadvantages like additional work, registering a database of personal information etc. The second option is to use one of external authenticators like Google Sign-In. Integrating a web application based on Spring Boot with Google Sign-In is easy. Let me show it to you step by step.
OAuth2 authentication
Google Sign-In uses OAuth2. Although integrating the authentication is possible without knowing details of OAuth2, it seems reasonable to know how it works. The below diagram shows how the authentication process looks like in case of a web application.

The image was created by Google Inc. and comes from https://developers.google.com/identity/protocols/OAuth2. It is licensed under the Creative Commons Attribution 3.0 license.
The web application has a client identifier assigned in the Google Sign-In system. It uniquely identifies the application but it is not a secret. If it leaks out, it is not a problem at all. Shared secret is a separate text that is known by the application and by Google. This one is crucial to be kept hidden.
When a user enters a page that requires signing in, the user is redirected to the Google Sign-In page. One of the request parameters is the client id so Google know which application the user signs into. If the authentication process is successful and the user agrees on the scope of data to be shared with the application, the application receives an authorization code. At this point, the browser claims the user has signed in, but the application cannot be sure about that because the authorization code came from the browser and has to be validated at Google.
Validation is done by sending the authorization code by the backend side of the application to the Google Sign-In system. If the latter confirms its correctness, it sends back an access token. At this stage the user is authenticated in the application. The token can be used to query Google API.
If you are interested in details, read/watch What is OpenID, OAuth2 and Google Sign In?
Register the application in Google
As you can see, the process requires a client identifier and a shared secret. To get them, you need a Google account.
- When you have one, log into Google API Console.
- Choose Credentials on the left menu.
- If you are there for the first time, you should see the Create a project button. Click it.
- Create the project.
- Create credentials - OAuth client ID by clicking an appropriate button.
- Choose an application type - in my case it is Web application.
- Provide URLs to your application that are authorized to request signing in through Google Sign-In. If you want to test it locally, typing http://localhost:8080 should work. Multiple URLs can be provided.
- In the Client ID section for Web application you will find Client ID and Client secret. Copy them out and save them in a secure place. You will need them later during configuration of the web application.
Web application
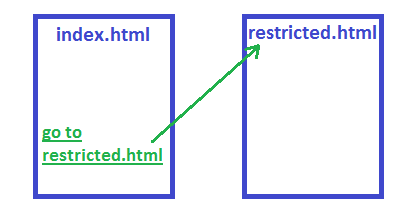
My application consists of two pages: index.html and restricted.html. The first one has a hyperlink to the latter one. A user can access both sites without logging in. Actually, there is no way to log in at all.
Java packages and the build process are managed by Gradle.
The application is built on top of Spring Boot. More on setting up a Spring Boot application can be found in the Spring Boot application on Tomcat article.
Enable OAuth2 through Spring Boot
Spring has a few modules to support security. I need two of them: Spring Security OAuth2 and Spring Cloud Security. I added them to the project by including them to the dependencies section in build.gradle.
dependencies {
    compile("org.springframework.boot:spring-boot-starter-security:1.4.1.RELEASE")
    compile("org.springframework.security.oauth:spring-security-oauth2:2.0.11.RELEASE")
    compile("org.springframework.cloud:spring-cloud-security:1.1.3.RELEASE")
}
To enable security I added WebSecurityConfiguration class that extends WebSecurityConfigurerAdapter and annotated with @Configuration.
@EnableOAuth2Sso
@Configuration
public class WebSecurityConfiguration extends WebSecurityConfigurerAdapter {

    @Override
    protected void configure(HttpSecurity http) throws Exception {
        http
                .csrf()
                    .disable()
                .antMatcher("/**")
                .authorizeRequests()
                .antMatchers("/", "/index.html")
                    .permitAll()
                .anyRequest()
                    .authenticated();
    }

}
It sets security up - index.html is allowed to view by all but the other page (restricted.html) requires being authenticated.
The key here is the @EnableOAuth2Sso annotation. It tells Spring Boot to use the OAuth2 algorithm for authentication. But the OAuth2 authentication process requires an authentication server. I do not have one and I would like to use an external one from Google. The following configuration is placed in application.yml so Spring Boot reads it and uses for the @EnableOAuth2Sso annotation.
security:
    oauth2:
        client:
            clientId: aaaaaaaabbbbbbbbbbbbcccccccccc.apps.googleusercontent.com
            clientSecret: 111122223333334444445555
            accessTokenUri: https://www.googleapis.com/oauth2/v3/token
            userAuthorizationUri: https://accounts.google.com/o/oauth2/auth
            tokenName: oauth_token
            authenticationScheme: query
            clientAuthenticationScheme: form
            scope: profile
        resource:
            userInfoUri: https://www.googleapis.com/userinfo/v2/me
            preferTokenInfo: false
Client ID and Client Secret copied out from the Google API Console are used in this file.
That is all that is required to use Google Sign-In in a web application based on Spring Boot.
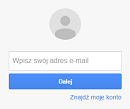
Now, the user can freely access index.html, but when he/she clicks the link to go to restricted.html, Spring Security redirects to the Google Authentication page.
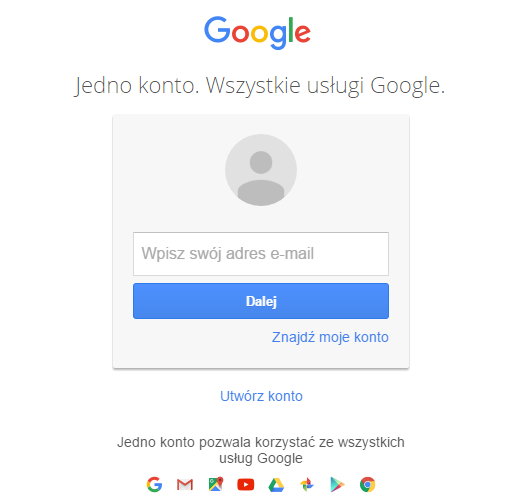
After a successful login and consent, the user can see the restricted.html page.
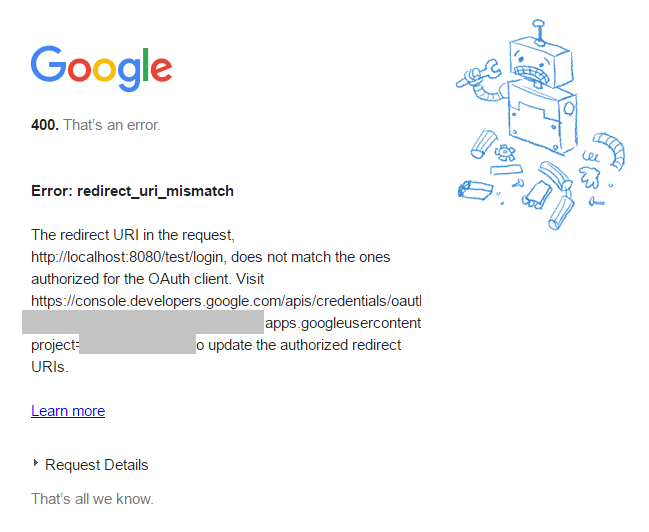
Redirect URI mismatch
If you see the redirect_uri_mismatch page instead of the login page, it means that probably you should go back to the Google API Console and add a proper URL to your application. For example, I see it if my application is deployed on http://localhost:8080/test, but I have only http://localhost:8080 added in Google.
If you would like to combine Google Sign In with Facebook authentication, check Google and Facebook login in one application.