 GitLab CI/CD is a strong competition to other Continuous Integration tools like Jenkins or TeamCity. Besides using GitLab for managing your repository and GitLab CI/CD for running automated tests, you can do deployment to AWS EBS with GitLab as well.
Before we start
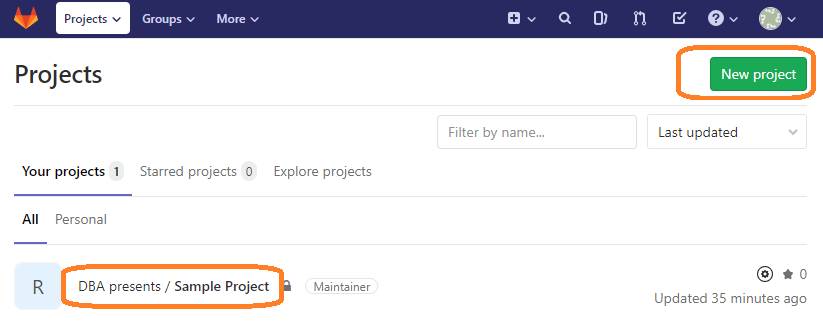
Before I show you how to configure GitLab to deploy your application to AWS Elastic Beanstalk, you should have your Git repository already in GitLab. If your source code is not there yet, you can create New project with the green button in the top right corner of the page and import an existing repository to GitLab.
I also assume you have an account on Amazon Web Services, an environment in Elastic Beanstalk and an up and running application there. You should make it working manually first before you start automating it.
Create access key on AWS
At this point you should have a web application on AWS Elastic Beanstalk and you can manually deploy a new version anytime. If that is untrue, learn how to do it and practice it.
To do a manual deployment you probably log into AWS Console with a username, password and MFA code (I hope). That will not work for GitLab CI/CD so for example you have to create an access key that will be used by automatic deployment.
To create access keys follow the below steps:
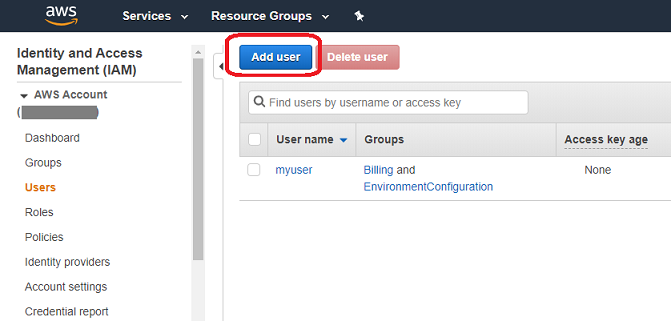
- Create a new user in the IAM area in AWS Console after logging in.
Access type should be Programmatic access. This allows accessing AWS through access keys (what we need) without a possibility of logging in with username and password.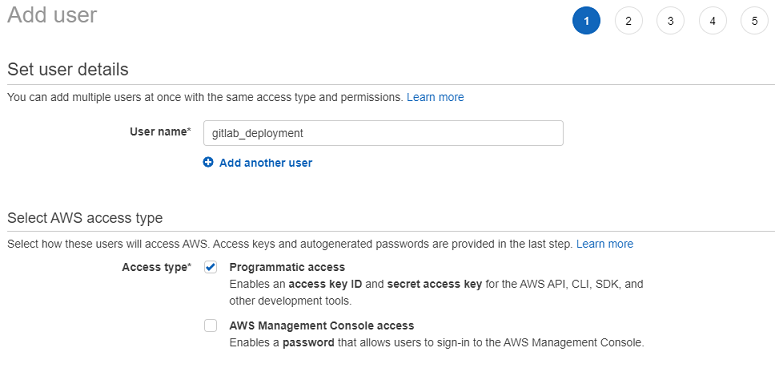
Choose AWSElasticBeanstalkFullAccess permission to allow the user to deploy applications to EBS.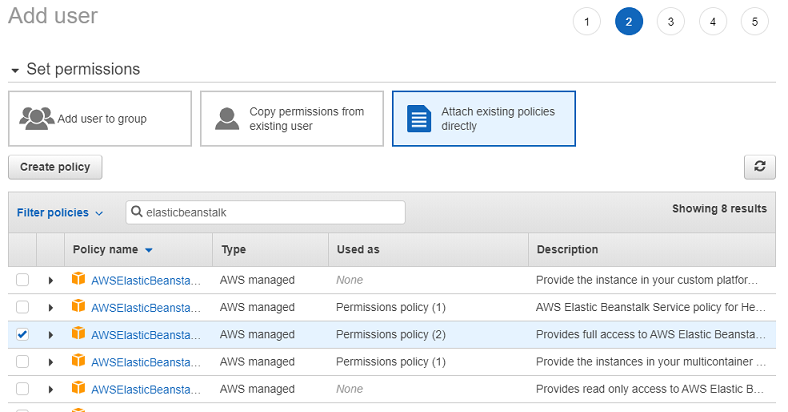
Then review the changes and create the user. The user should appear on the users list.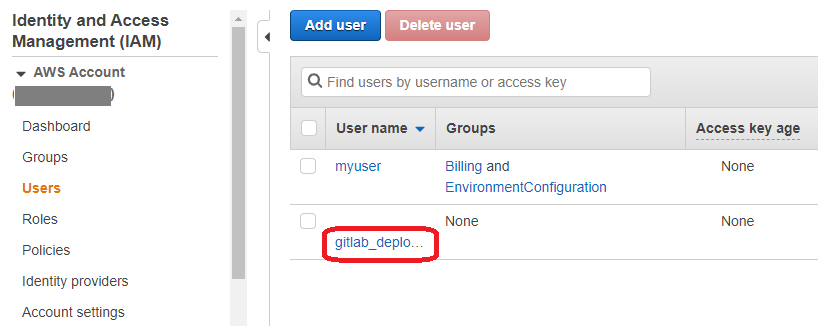
- Click the user name to enter user's details. Go to the Security Credentials tab. There are no access keys, yet.
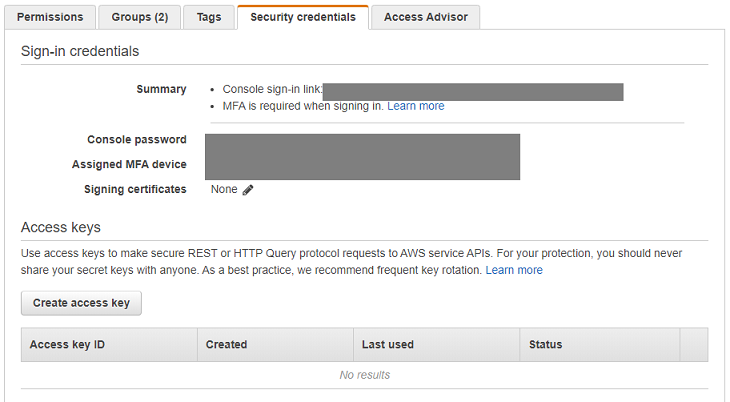
Click Create access key button. A popup with auto-generated access key should appear. Copy the values somewhere else. Especially the second one - if you loose it, you will have to create it again. There is no way to recover the same key. Additionally, be sure to strongly protect the keys. If anybody else knew them, it would be a big security violation. Other person would have access to your AWS environment.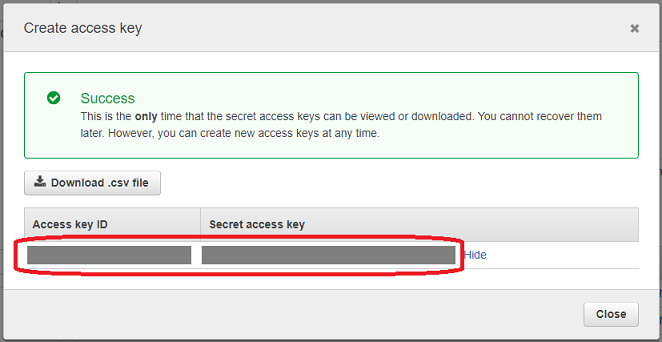
Now, you have a programmatic access to AWS EBS. You may test it manually with AWS CLI but I will go straight to GitLab.
Add access key to GitLab
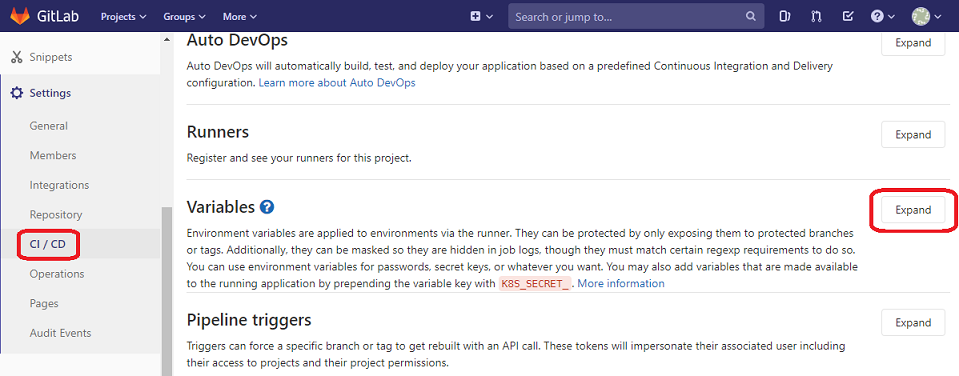
Add the access key to Variables in CI/CD section in GitLab to make it accessible for Continuous Integration scripts. Choose Settings -> CI/CD on the left menu. Then click Expand in the Variables section.
Add two separate variables for the access key and the secret access key. Both are values generated by AWS in the IAM section. Remember to choose Masked option which will enable special treatment of these values. Without it those values might appear in GitLab logs which is obviously a security violation. The secret access key must be strongly protected as it allows accessing your AWS environment.
Then click Save variables.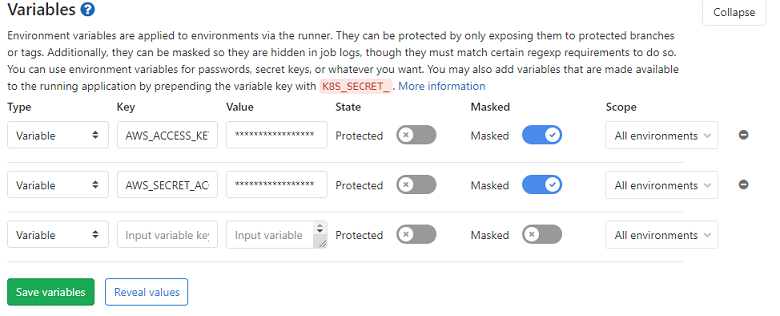
Create GitLab CI/CD script
Build tasks in GitLab CI/CD are defined through .gitlab-ci.yml file on the root level of the repository. Here is a sample content of the file that has two stages and two tasks: build and deploy.
image: java:8-jdk

stages:
  - build
  - deploy

build:
  stage: build
  allow_failure: false
  script:
    - ./gradlew clean build test war
  artifacts:
    paths:
      - build/libs/mySampleApp.war

deploy:
  image: python:latest
  stage: deploy
  script:
    - pip install awscli
    - aws configure set aws_access_key_id $AWS_ACCESS_KEY_ID
    - aws configure set aws_secret_access_key $AWS_SECRET_ACCESS_KEY
    - aws configure set region eu-central-1
    - aws s3 cp build/libs/mySampleApp.war s3://elasticbeanstalk-eu-central-1-11111222222233/mySampleApp-$CI_PIPELINE_ID.war
    - aws elasticbeanstalk create-application-version --application-name mySampleApp --version-label mySampleApp-$CI_PIPELINE_ID --source-bundle S3Bucket=elasticbeanstalk-eu-central-1-11111222222233,S3Key=mySampleApp-$CI_PIPELINE_ID.war
    - aws elasticbeanstalk update-environment --application-name mySampleApp --environment-name mySampleApp-env --version-label mySampleApp-$CI_PIPELINE_ID
  dependencies:
    - build
The first stage - build consists of build task which simply runs gradle tasks that builds the web application and creates WAR file. This task exposes the created WAR file so it is copied over to the other task - deploy. Thanks to that, deploy task can use mySampleApp.war.
The second stage - deploy consists of deploy task which is very different to the first one because it uses python image not JDK. It is done that way to take advantage of a possibility to install awscli which is needed to do the deployment to AWS. The body of the task includes a series of command line operations. Let's go through it one by one:
-
pip install awscli
It installs awscli using python's pip. awscli is a command line tool to manage AWS. -
aws configure set aws_access_key_id $AWS_ACCESS_KEY_ID
It configures an access key id that will be used in communication between GitLab's docker container and AWS. The variable that starts with $ sign has already been configured in the previous chapter. GitLab CI/CD will recognize that it is a variable and will replace it with the configured value. -
aws configure set aws_secret_access_key $AWS_SECRET_ACCESS_KEY
It is like above but it sets a secret access key. -
aws configure set region eu-central-1
It switches AWS region to eu-central-1. This is a location where is my Elastic Beanstalk environment. Modify it according to the location of your environment. It is an equivalent of manually changing the region when you log into AWS Console through a web browser. -
aws s3 cp build/libs/mySampleApp.war s3://elasticbeanstalk-eu-central-1-11111222222233/mySampleApp-$CI_PIPELINE_ID.war
It copies the WAR file from the local (GitLab CI/CD's docker container) to S3 bucket. You can find the address of S3 bucket in AWS Console in the S3 area. $CI_PIPELINE_ID is a variable that contains a unique number for a pipeline. Each time when the process of building and deploying starts, a new number is assigned and it is the same for both tasks. I need it to avoid WAR file names collision in S3 buckets. -
aws elasticbeanstalk create-application-version --application-name mySampleApp --version-label mySampleApp-$CI_PIPELINE_ID --source-bundle S3Bucket=elasticbeanstalk-eu-central-1-11111222222233,S3Key=mySampleApp-$CI_PIPELINE_ID.war
It creates a new application version from the WAR file that was copied in the previous step. -
aws elasticbeanstalk update-environment --application-name mySampleApp --environment-name mySampleApp-env --version-label mySampleApp-$CI_PIPELINE_ID
It makes the actual deployment. It replaces the application with the version that was created above.
That is pretty it. After these steps, a new application version is deployed to AWS Elastic Beanstalk.
It is worth to mention that the build-deploy process (a pipeline) is triggered by each commit to the repository. There are more options available. For example you can make the pipeline manual so it does not automatically starts with a commit. If you want to do that or anything else, check GitLab CI/CD documentation.