 Previously I showed you what project we are going to work on. I do not want to postpone it further so this time I will build first JS bundles. I will do it almost at minimum cost. Almost means that it could be simpler but I want to make flexible so I could extend it in the next articles.
Table of contents
If you want to jump to other parts of the tutorial, use table of contents.
NPM installation
Webpack is an excellent bundler but it has to have something to bundle. When developing web application you will want to use not only your own code but also external libraries like jQuery and lodash. Of course, you can download each of them manually and copy-paste to your application source code. That does not seem smart and as we live in the XXI century, there are better ways to do that. One of them is to engage a package manager. I will use one of the most popular ones - NPM.
You will see how to use it later in the tutorial but now I will install it.
First, I need NPM to be available on the computer. Various ways of installing it is described on the NPM installation page. In my opinion, the easiest way is to install Node. NPM is installed as a dependency during Node installation. If you do not have it already, please do so now.
After doing that, make sure npm is added to the PATH environment variable. In my case it is C:\Users\DBA\AppData\Roaming\npm.
Setup correctness can verified by the following command:
C:\Users\DBA>npm -version
6.4.1
Obviously, the returned version number can be different.
Once, npm command works, I go to the project directory D:\Git\multi-page-webpack-example, then to src and I initiate npm.
D:\Git\multi-page-webpack-example>cd src
D:\Git\multi-page-webpack-example\src>npm init -y
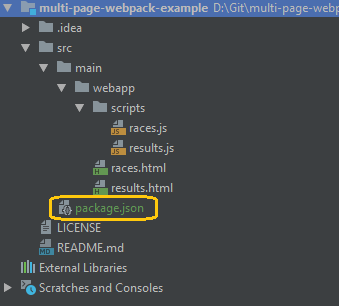
If you wonder what "initiate npm" means, I will tell you - it creates package.json file in the current directory which contains configuration of NPM and a list of dependencies. Initial content of my package.json:
{
  "name": "src",
  "version": "1.0.0",
  "description": "",
  "main": "index.js",
  "scripts": {
    "test": "echo \"Error: no test specified\" && exit 1"
  },
  "keywords": [],
  "author": "",
  "license": "ISC"
}
Webpack installation
NPM which was installed in the previous section, it will now get really useful. I will install Webpack. To be more precise, I request two packages:
- webpack - the main and necessary package,
- webpack-cli - command line interface - it is useful for people who want to avoid editing configuration files.
D:\Git\multi-page-webpack-example\src>npm install webpack webpack-cli --save-dev
npm notice created a lockfile as package-lock.json. You should commit this file.
npm WARN src@1.0.0 No description
npm WARN src@1.0.0 No repository field.
npm WARN optional SKIPPING OPTIONAL DEPENDENCY: fsevents@1.2.4 (node_modules\fsevents):
npm WARN notsup SKIPPING OPTIONAL DEPENDENCY: Unsupported platform for fsevents@1.2.4: wanted {"os":"darwin","arch":"any"} (current: {"os":"win32","arch":"x64"})
+ webpack-cli@3.1.2
+ webpack@4.27 .1
added 379 packages from 288 contributors and audited 4263 packages in 77.653s
found 0 vulnerabilities
According to the above output, the packages were installed. During this process package.json was updated:
package.json:
-----------
{
  "name": "src",
  "version": "1.0.0",
  "description": "",
  "main": "index.js",
  "scripts": {
    "test": "echo \"Error: no test specified\" && exit 1"
  },
  "keywords": [],
  "author": "",
  "license": "ISC",
  "devDependencies": {
    "webpack": "^4.27.1",
    "webpack-cli": "^3.1.2"
  }
}
Information about two packages were added along with their versions. It is useful because theoretically I do not have to check in webpack source code to the code repository. Whoever has this package.json file can use NPM to download these files directly from NPM repository.
It is worth mentioning that both entries were added to the devDependencies section which means they are needed at the development stage. Later in this tutorial I will show you other options.
You probably already noticed that package.json has some weird entries. Now, I am going to correct them. One example is a name of the project. NPM generated it as src based on the directory name which is simply wrong in my case. I change it to something meaningful - multi-page-webpack-example seems good. I also remove the main property. I do not need it as it points to the entry file in the project but Webpack will have it in its own configuration. NPM does not have to have this information.
package.json:
-------------
{
  "name": "multi-page-webpack-example",
  "version": "1.0.0",
  "description": "",
  "scripts": {
    "test": "echo \"Error: no test specified\" && exit 1"
  },
  "keywords": [],
  "author": "",
  "license": "ISC",
  "devDependencies": {
    "webpack": "^4.27.1",
    "webpack-cli": "^3.1.2"
  }
}
Webpack configuration
Whatever Webpack needs to know about the project and cannot figure out by itself, can be delivered to it with webpack.config.js file. I create one in the main directory next to package.json.
webpack.config.js
------------
module.exports = {
    entry: {
        races: "./main/webapp/scripts/races.js",
        results: "./main/webapp/scripts/results.js",
    },
    output: {
        path: __dirname + "/main/webapp/dist/",
        filename: "scripts/[name].bundle.js"
    }
};
At the beginning, I use two sections: entry and output. The former defines entry points to the application which are the first files from which Webpack starts dependency analysis. The above configuration file has two entry points because the application is a multi page application - there are two independent pages so I would like to build bundles separately for those two pages. It does not have to be like that, I could decide to build one big bundle for the whole application but I do not want the browser to download all resources for the entire application even if the user enters only races.html page. That is why I am going to stay with those two chunks: races and results. Output defines properties of the generated bundles. In this case they are: a path and a filename of the bundle. If you look closely enough, you will notice __dirname which is Node.js global variable that contains a path to the current module. It is filled in with a proper value by Node.js. The filename looks strange as well. It is because [name] is a placeholder. The bundle file will not be [name].bundle.js but [name] will be replaced with the chunk name. You will see it soon.
Running Webpack
It seems that I have all I need to build the bundles. The only action at this point is to use npx to run Webpack. NPX is an NPM package runner. Now, it is the easiest way to build a bundle. Later, I will show you other more practical ways but now let's focus on Webpack.
D:\Git\multi-page-webpack-example\src>npx webpack
npx: installed 1 in 4.166s
The "path" argument must be of type string
D:\Git\multi-page-webpack-example\src\node_modules\webpack\bin\webpack.js
Hash: 38635175bb4fdf479e2c
Version: webpack 4.27.1
Time: 181ms
Built at: 2018-12-09 22:34:01
                    Asset      Size  Chunks             Chunk Names
  scripts/races.bundle.js   1.2 KiB       0  [emitted]  races
scripts/results.bundle.js  1.55 KiB       1  [emitted]  results
Entrypoint races = scripts/races.bundle.js
Entrypoint results = scripts/results.bundle.js
[0] ./main/webapp/scripts/races.js 502 bytes {0} [built]
[1] ./main/webapp/scripts/results.js 1.33 KiB {1} [built]

WARNING in configuration
The 'mode' option has not been set, webpack will fallback to 'production' for this value. Set 'mode' option to 'development' or 'production' to enable defaults for each env
ironment.
You can also set it to 'none' to disable any default behavior. Learn more: https://webpack.js.org/concepts/mode/
As you can see above, Webpack processed two entry points: races and results. This is exactly what I asked him to do in webpack.config.js. Now, I can notice that two new files appeared in dist/scripts directory.
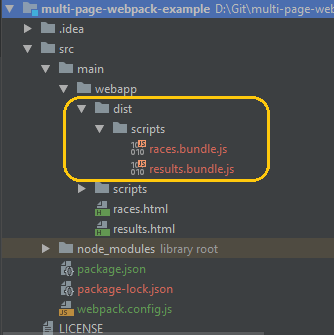
Is not the time to deeply analyze the files' content but it will not do any harm if we take a quick look.
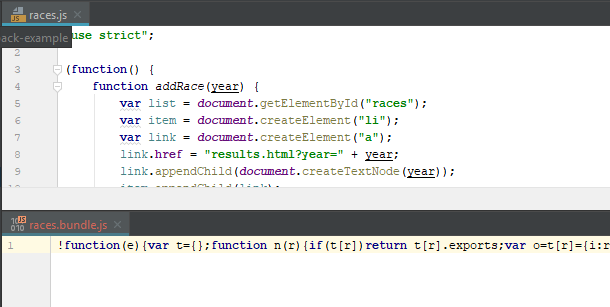
The bundled file is definitely less readable. Webpack took the original files, moved everything to one line, shortened variable names and did other optimizations. Probably took some actions mentioned as minification.
Test bundles
There is one thing that you might be concerned about - do the scripts still work after those changes? Of course, I have to verify that. Temporarily, I modify races.html and results.html to use the bundles not the original JS files.
races.html
 ------------------------
 <head>
     <meta charset="utf-8">
     <meta http-equiv="X-UA-Compatible" content="IE=edge">
     <title>Previous races</title>
     <script src="dist/scripts/races.bundle.js"></script>
 </head>
 <body>

 <h1>Previous races</h1>
 <p>Choose edition to see results from a particular race.</p>
 <ul id="races">
 </ul>

 </body>
 </html>
results.html
 ------------------------
 <!DOCTYPE html>
 <head>
     <meta charset="utf-8">
     <meta http-equiv="X-UA-Compatible" content="IE=edge">
     <title>Race results</title>
     <script src="dist/scripts/results.bundle.js"></script>
 </head>
 <body>

 <h1>Race results</h1>
 <table id="results">
     <thead>
     <tr>
         <td>Position</td>
         <td>Runner</td>
         <td>Final time</td>
     </tr>
     </thead>
     <tbody>
     <tr></tr>
     </tbody>
 </table>

 <div id="resultsNotAvailable">Results are not available, yet.</div>

 </body>
 </html>
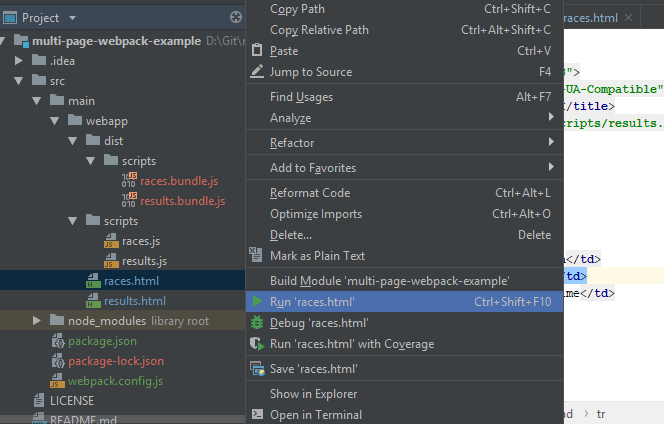
Then, I run races.html to see that everything works well.
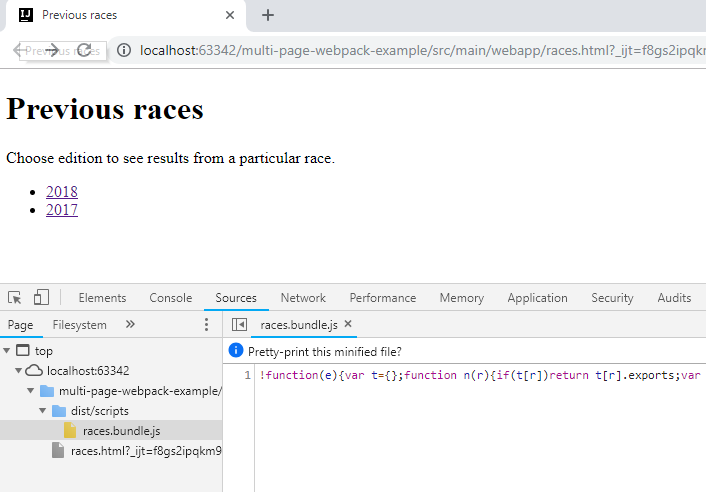
After the test, I change races.html and results.html back to the original content. They should use not minified JS files.
Summary
In this part I added Webpack to the project, configured it to bundle JS files and ran the bundling process.
Source code created in this part is on tutorial/part02-first-bundles branch on GitHub.

