 Would you like to use Bootstrap but you do not know how to force webpack to bundle it? This part of the tutorial for webpack describes how to add any external CSS library to a project with webpack.
Table of contents
If you want to jump to other parts of the tutorial, use table of contents.
Install Bootstrap
There are many libraries that provide CSS that can be used by developers (JS libraries were covered last time). Bootstrap is one of the most popular ones so I will use it as an example. As almost always, the first step is to install it with NPM:
npm install bootstrap --save-dev
It downloads Bootstrap to node_modules directory and adds a dependency to package.json.
package.json
------------
{
   "name": "multi-page-webpack-example",
   "version": "1.0.0",
   "description": "",
   "scripts": {
     "test": "echo \"Error: no test specified\" && exit 1"
   },
   "keywords": [],
   "author": "",
   "license": "ISC",
   "devDependencies": {
     "bootstrap": "^4.3.1",
     ...
     "webpack": "^4.27.1",
     "webpack-cli": "^3.1.2"
   }
}
Now, Bootstrap is available in the project.
Import and use of Bootstrap
Bootstrap provides many useful features. For example, grid system which I already described some time ago. Besides that, it provides many CSS classes that I can use to enhance look and feel of the website. Today, I will use two of them.
Both changes will be done for the results page:
- I dislike the current look of the results table so I want to use default table's style from Bootstrap.
- When I choose year 2018, a message with results are not available, yet appears. I want it to look like a warning so I will use the alert feature of Bootstrap.
Before I even use it, I have to tell webpack that I am going to use Bootstrap. An import statement is the one I need in the entry point for the results page. The entry point is results.js.
results.js
----------
"use strict";

 import 'bootstrap/dist/css/bootstrap.css';
 import '../styles/main.scss';
 import * as urlParams from './urlparams.js';
 import $ from 'jquery';

 (function($) {
     ...
 })($);
Once the import is there, I add Bootstrap classes to the HTML file.
results.html
------------
<!DOCTYPE html>
 <head>
     <meta charset="utf-8">
     <meta http-equiv="X-UA-Compatible" content="IE=edge">
     <title>Race results</title>
 </head>
 <body>
 <div class="main-container">
     <h1>Race results</h1>
     <table id="results" class="table">
         <thead>
         <tr>
             <td>Position</td>
             <td>Runner</td>
             <td>Final time</td>
         </tr>
         </thead>
         <tbody>
         <tr></tr>
         </tbody>
     </table>
     <div id="resultsNotAvailable" class="alert alert-warning" role="alert">Results are not available, yet.</div>
 </div>
 </body>
 </html>
I think you have got used to it already - I do not add a link tag to the HTML file. The HTML file will be generated by webpack. All I need to do is to add an import statement to JS scripts which are entry points for HTML files that require Bootstrap.
Bundling
All should work now. Let's build the package.
npx webpack --mode=development
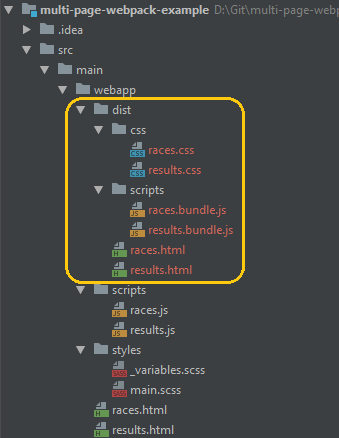
If I take a look at dist directory, I can see no major change. There are still only two CSS files. I cannot see the third one (for Bootstrap) but that is fine. Just open results.css and you will see that the Bootstrap styles are there. Splitting code to multiple files is for developers not for browsers. Some files are merged together in the minification process by webpack for better performance.

You can open dist/races.html in the browser and navigate to the results page for 2017 and 2018 and check that the table and the message has Bootstrap styles.


Summary
It was just a simple example but it showed how to import external library with CSS files and let webpack to bundle them with our code.
Source code created in this part is on tutorial/part09-external-css-library branch on GitHub.

