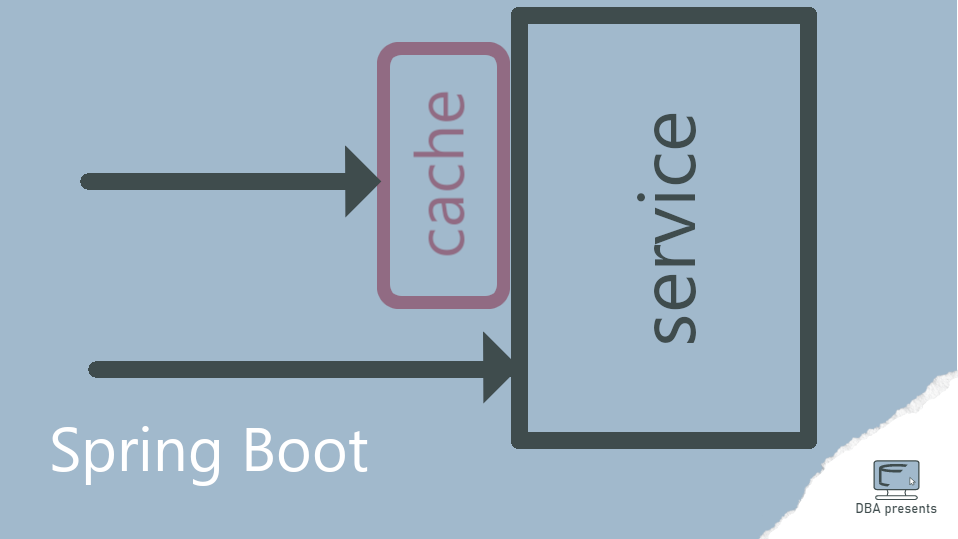
Adding cache to a Spring Boot 3 application is very quick and easy. It is a matter of choosing one of a few supported cache managers and putting relevant annotations to proper places in the code. Caffeine cache is one of the options.
Why to use cache
Most real life systems read data from databases or external systems over an API. They often contain heavy steps in the processing flow. These operations might be time consuming or require significant amount of CPU Cycles. If such tasks are repeatable enough and using a little older then real time data is acceptable, then we are on a straight path to caching.
The idea is very simple. When the data is requested for the first time, it is computed in a normal way. It is added to a cache and passed over for further processing. But next time when the same data is requested, it already exists in the cache, and it does not have to be calculated again. It is almost instantaneously retrieved from an optimized cache.
That is, obviously, a very simple case, but it shows the idea of caching data.
That's enough of the theory. Let's go to a simple example. Imagine, that we have a class responsible for calculating user statistics.
public class StatsService {

  private final Random random = new Random();

  public UserStats getUserStats(int userId) {
     System.out.println("Calculating stats for userId=" + userId);
     return new UserStats(userId, getRequestsCountFromDb(userId));
  }

  private int getRequestsCountFromDb(int userId) {
     // heavy operation
     try {
        Thread.sleep(1000);
     } catch (InterruptedException e) {
        throw new RuntimeException(e);
     }

     return random.nextInt();
  }

}
In real life it may read some data from a database and do some calculations. To simulate such a case, I created getRequestsCountFromDb method, which takes at least 1 second because of Thread.sleep(1000) used inside. If the getUserStats method is called frequently, one second per execution may quickly become too much. If using cached results instead of calculating fresh statistics is acceptable, then we have a perfect case for using caching.
Spring Boot 3 support for caching
Spring boot 3 has great support for caching. It can easily handle these cache providers:
We can do as little as possible to enable caching for a particular method. Majority of configuration will be taken care of by Spring Boot setting practical defaults. To begin a magic happening, we add spring-boot-starter-cache dependency.
<dependency>
  <groupId>org.springframework.boot</groupId>
  <artifactId>spring-boot-starter-cache</artifactId>
</dependency>
To enable caching of the getUserStats method, we have to instruct Spring to do so. It is done by adding @Cacheable annotation. Be aware that such spring annotations work only on public methods called from other objects. So don't expect, that annotating the getRequestsCountFromDb method would work.
In our case, we will specify two parameters to the @Cacheable annotation. The first one, cacheNames, indicates which cache should be used for results of this method. That is important, because we may have multiple caches for multiple operations. The second one, defines keys for cached values. Here, it is #userId, which means that a result for each userId should be separately cached. If the cache already contains a value for userId=1 and now statistics for userId=2 are needed, they have to be calculated, because the cache does not contain it, yet.
@Service
public class StatsService {

  private final Random random = new Random();

  @Cacheable(cacheNames = "stats", key = "#userId")
  public UserStats getUserStats(int userId) {
     System.out.println("Calculating stats for userId=" + userId);
     return new UserStats(userId, getRequestsCountFromDb(userId));
  }

  private int getRequestsCountFromDb(int userId) {
     // heavy operation
     try {
        Thread.sleep(1000);
     } catch (InterruptedException e) {
        throw new RuntimeException(e);
     }

     return random.nextInt();
  }

}
We are almost done. One more annotation is needed - @EnableCaching. Any Spring configuration class would do the job, but the main application class, the one with @SpringBootApplication is also a good choice.
@EnableCaching
@SpringBootApplication
public class CaffeineCacheSpringExampleApplication {

  public static void main(String[] args) {
      SpringApplication.run(CaffeineCacheSpringExampleApplication.class, args);
   }

}
That was quick, and simple, wasn't it? As it went fast, let's create a quick test to check, if it really works. Here is an easy unit test. It gets statistics for two users twice. Without a cache, we would expect the getUserStats method to be executed four times, and the output would look like this:
Calculating stats for userId=1
Calculating stats for userId=2
Calculating stats for userId=1
Calculating stats for userId=2
Duration 4103 ms
But now, with a cache, the statistics calculation is done only twice - once for each userId.
Calculating stats for userId=1
Calculating stats for userId=2
Duration 2053 ms
So little is needed to enable caching in a Spring Bood 3 application.
Caffeine cache with Spring Boot
That worked. But how about cache expiration, cache size and other more advanced options? For those, we need to realize that Spring Boot by default uses a generic cache based on a simple HashMap. It does not provide many configuration options. But we are not locked to only this implementation. There are many more out there!
For example, to use Caffeine instead of a simple HashMap, a Caffeine dependency must be added to the project.
<dependency>
  <groupId>com.github.ben-manes.caffeine</groupId>
  <artifactId>caffeine</artifactId>
</dependency>
Then, we need to make CaffeineCacheManager available for Spring Boot as a bean. It can be easily done by implementing a config class.
@Configuration
public class CacheConfig {

  @Bean
  public CacheManager cacheManager() {
     CaffeineCacheManager cacheManager = new CaffeineCacheManager("stats");
     cacheManager.setCaffeine(
        Caffeine.newBuilder()
           .maximumSize(100)
           .expireAfterWrite(5, TimeUnit.SECONDS)
     );
     return cacheManager;
  }

}
It has a @Configuration annotation, which tells Spring to process it before service and component classes. The cacheManager method is an initializer for CacheManager. As you can see inside, it creates a CaffeineCacheManager object and returns it. Now, Spring will see it and it will use it instead of looking for other cache implementations.
In this simple example of initializing a Caffeine cache, I configured two new parameters: maximum size of a cache and a condition when values should expire. The first one is rather obvious. The second one tells Caffeine to mark as expired all values that have been added to the cache longer than 5 seconds ago. If these values are queried again after that time, the cache will not provide them, but fresh data will be calculated.
We can check, how it works in practice by executing below test:
@Test
void shouldGetUsersStatsInLoop() throws InterruptedException {
  long timeStart = System.currentTimeMillis();
  for (int i = 1; i <= 10; i++) {
     System.out.println("Loop number " + i);
     statsService.getUserStats(1);
     statsService.getUserStats(2);
     Thread.sleep(1000);
  }
  System.out.println("Duration " + (System.currentTimeMillis() - timeStart) + " ms");
}
I got the following result:
Loop number 1
Calculating stats for userId=1
Calculating stats for userId=2
Loop number 2
Loop number 3
Loop number 4
Loop number 5
Calculating stats for userId=1
Calculating stats for userId=2
Loop number 6
Loop number 7
Loop number 8
Loop number 9
Calculating stats for userId=1
Calculating stats for userId=2
Loop number 10
Duration 16191 ms
When the getUserStats method is called for the first time for each user, the values are calculated and added to the cache. They are reused for three more iterations until 5 seconds have passed and the cached values have expired. Then, they have to be computed again, they are reused for 5 seconds, and the game starts over.
I think these two options are very useful. However, Caffeine supports a few other configuration items as well:
expireAfterAccess- cached values are expired after they have not been used for a defined time,initialCapacity- instead of an incrementally growing cache size, internal cache structure may be initialized to a defined size at the beginning,maximumWeight- an alternative to maximumSize; it defines a full cache state based on a condition using weights,recordStats- tells Caffeine to record cache statistics for further analysis,- and a few more; check Caffeine documentation for currently supported options.
The whole source code of the described Caffeine cache example is on GitHub.